Wordpress on Kubernetes

While hosting a blog on Kubernetes might be somewhat of an overkill, it can make for a good learning experience. In this tutorial, let's deploy Wordpress with Kalm in 5 minutes.
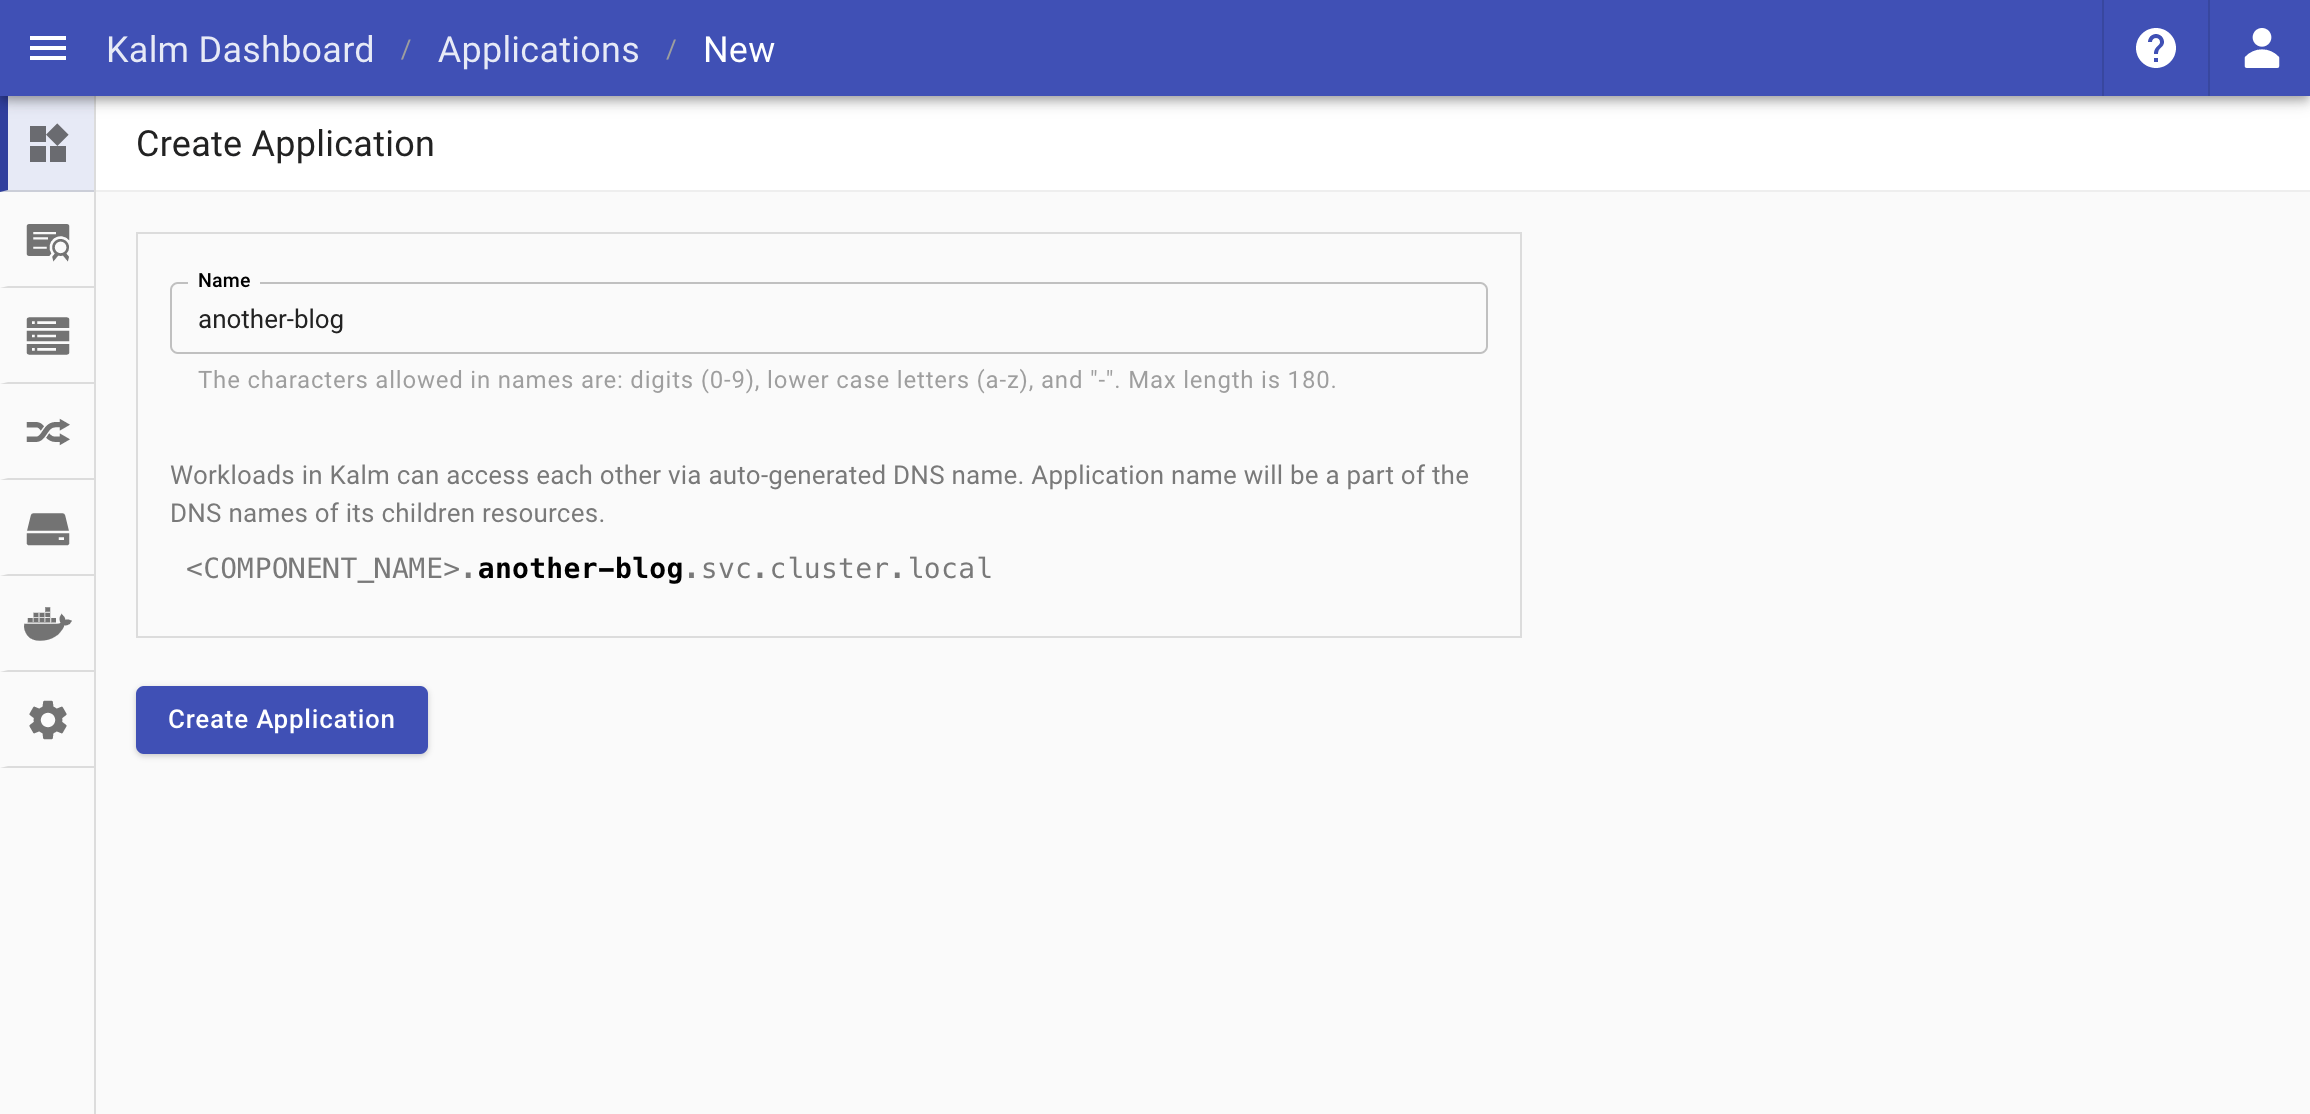
Create New Application
The first thing we need is a new Application for the two components that make up our WordPress site.
- In your Kalm application dashbord, click Create App and enter your application's name
We used the name another-blog for this tutorial.
Add The Database Component
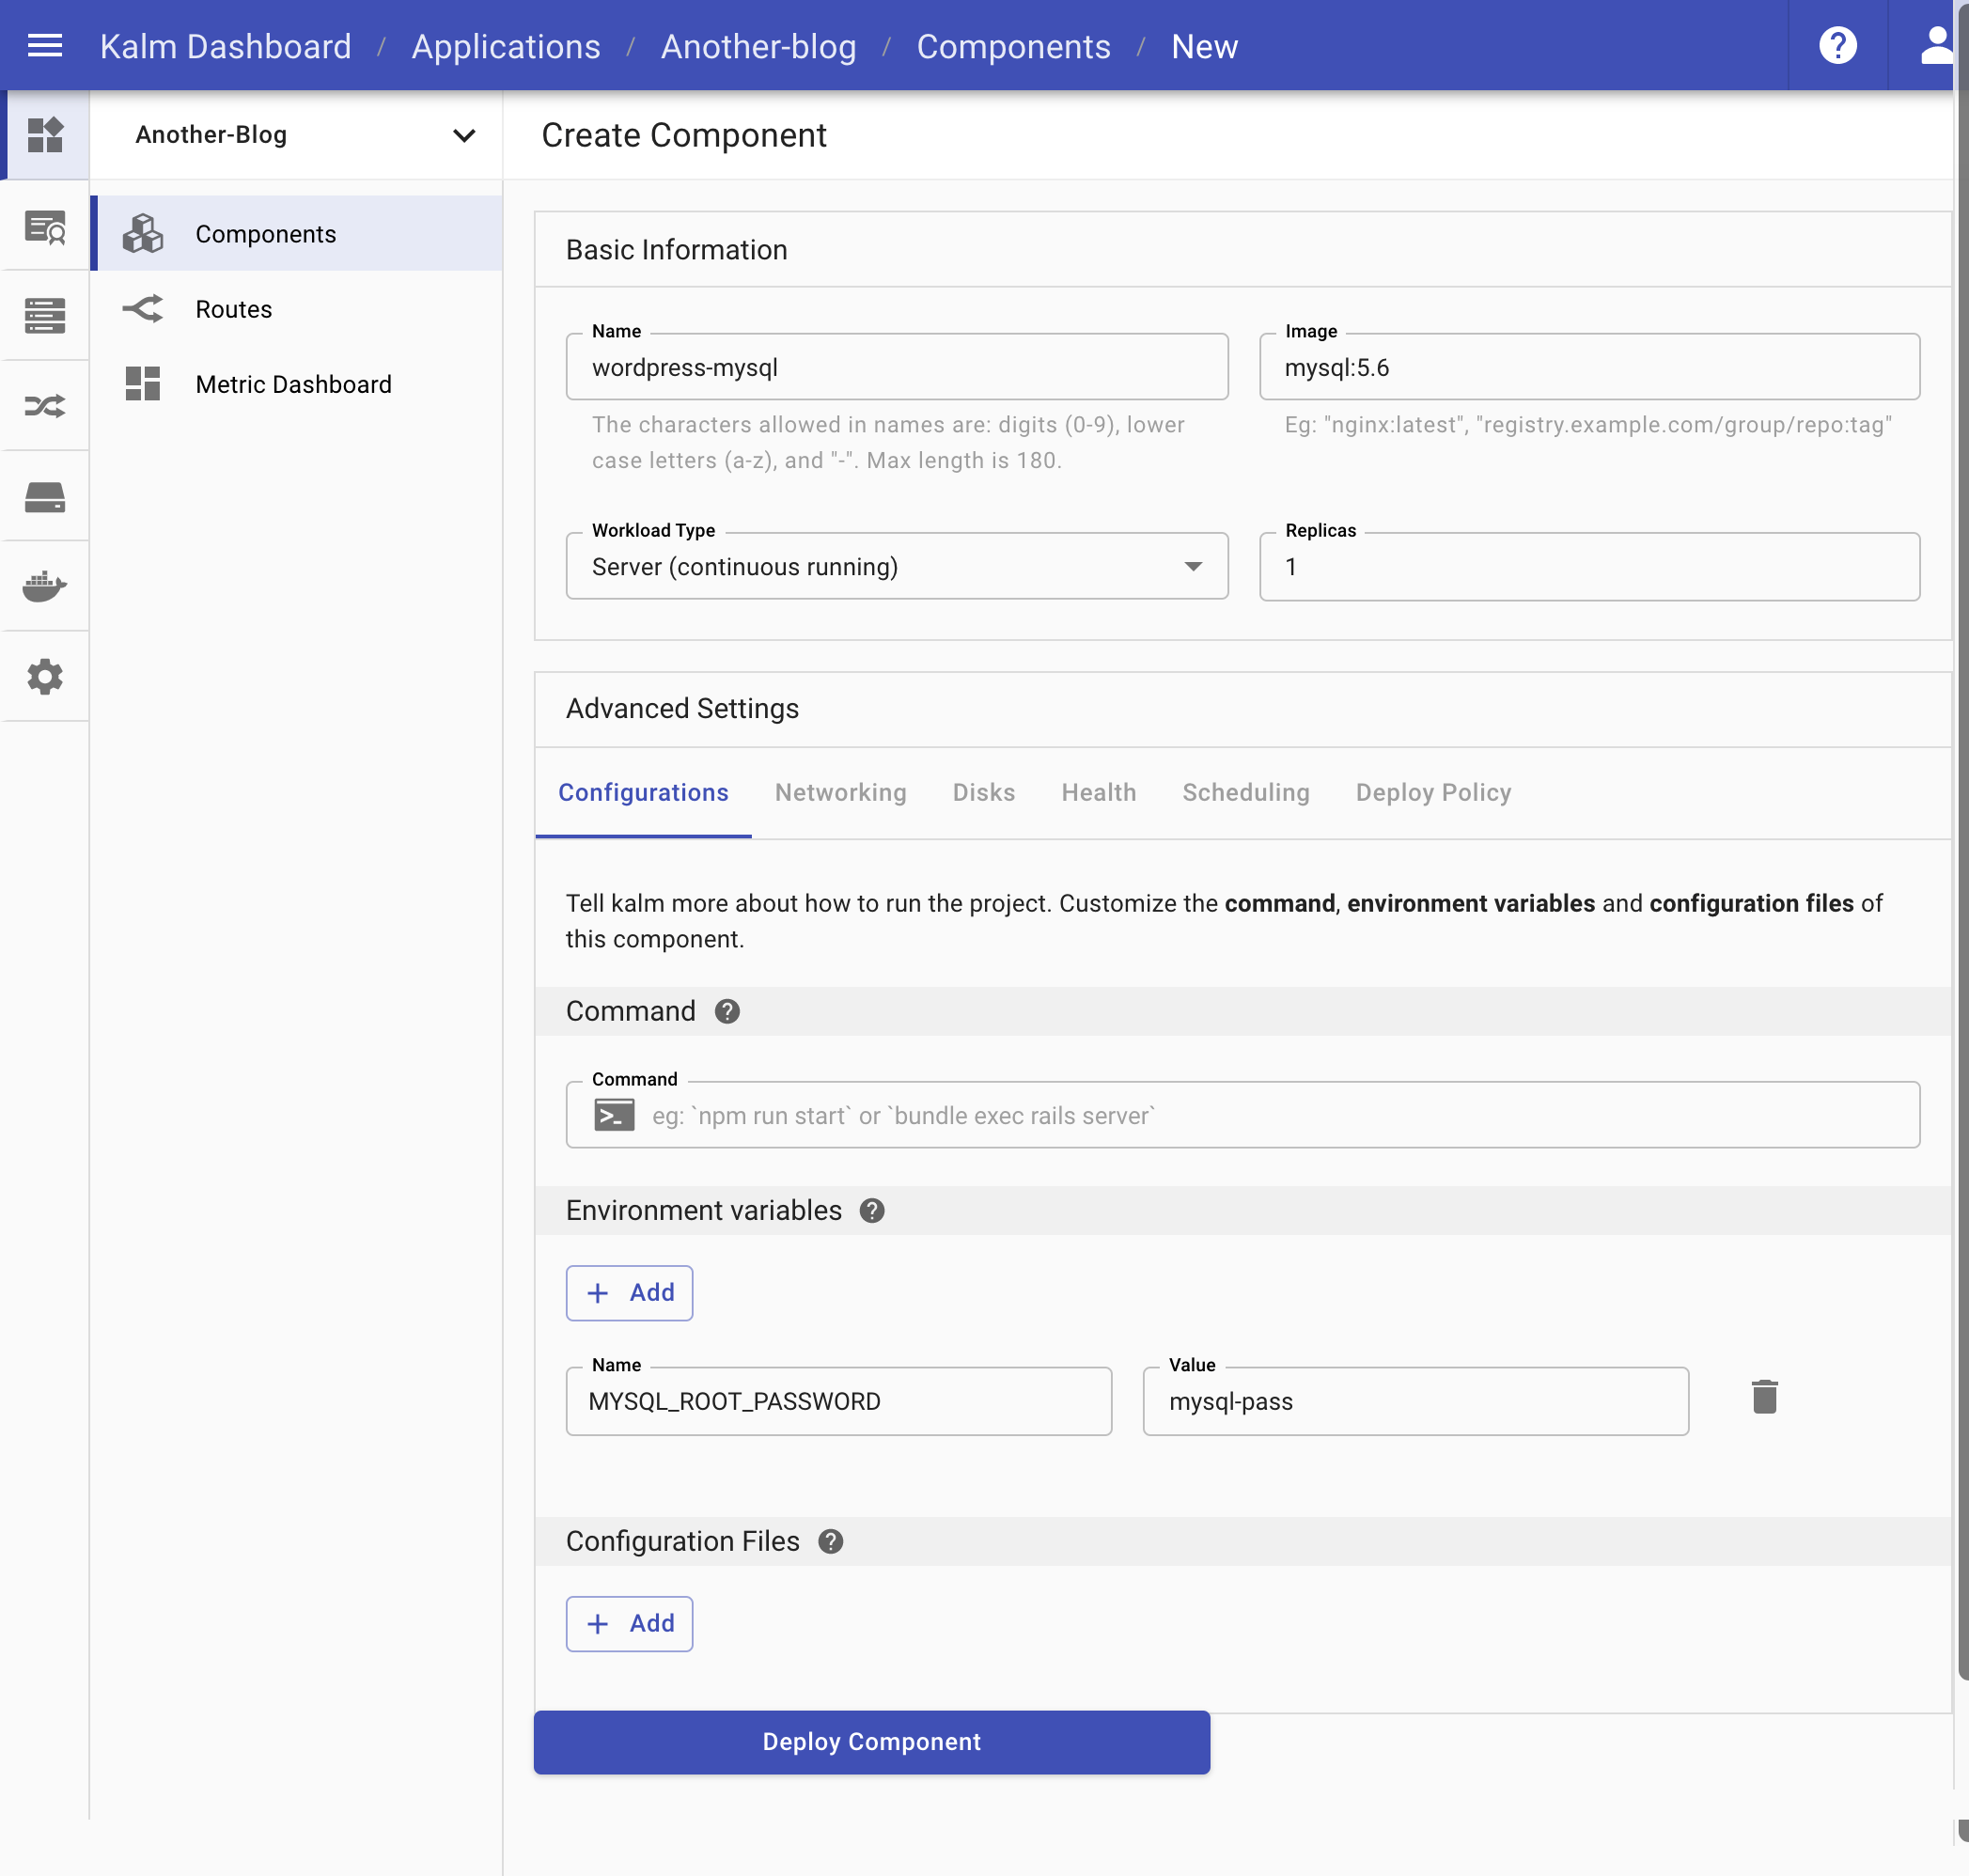
Once you create the application, you'll be prompted to add a component to it. We'll start by adding our Database Component.
- For the component Name, enter
wordpress-mysql - For the component Image, enter
mysql:5.6
Configurations
Next we'll move into the Config tab.
- Under Environment Variables, click + New Variable
- For the Name, enter
MYSQL_ROOT_PASSWORD - For the Value, enter
mysql-pass
- For the Name, enter
Networking
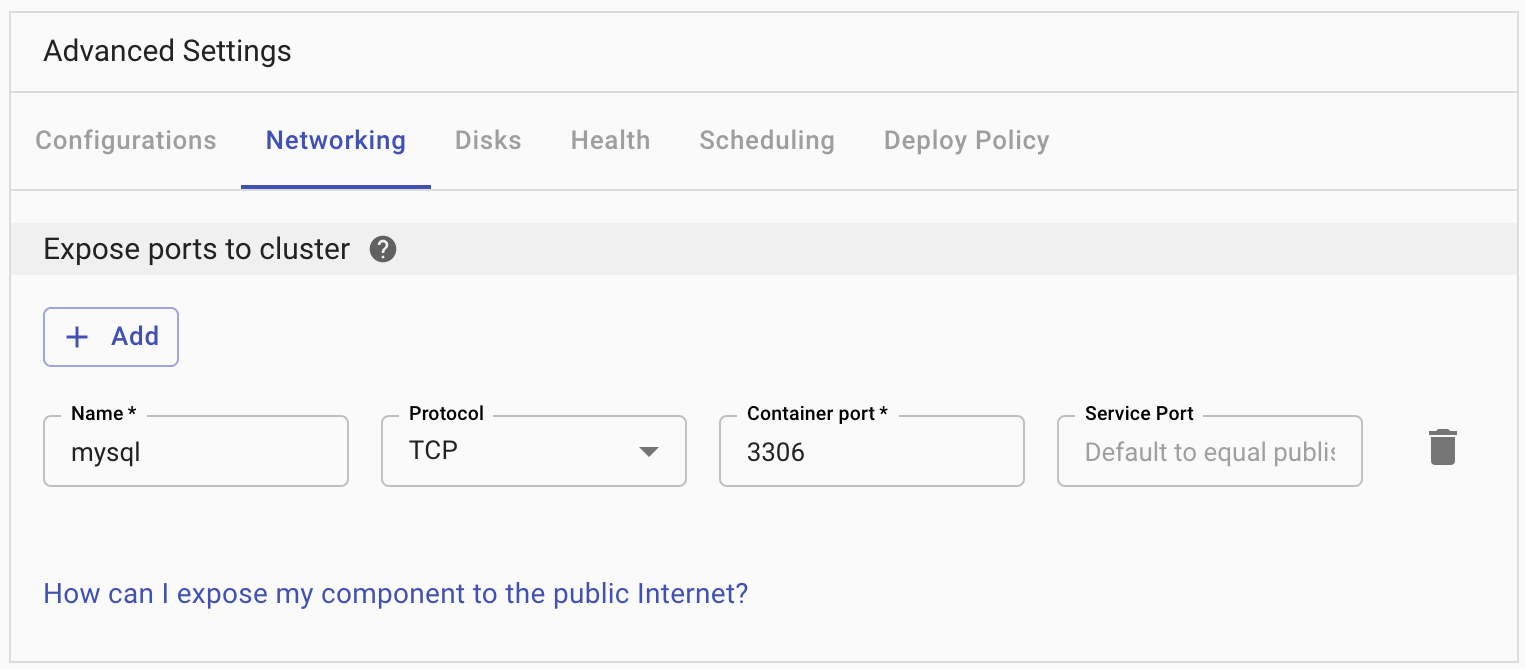
Now we'll expose a Container Port to the cluster so we can access this image. Click the Networking tab.
- Under Ports, click + ADD
- For the Protocol, keep the default
http - For the Container Port, enter
3306 - You can keep the Service Port blank
- For the Protocol, keep the default
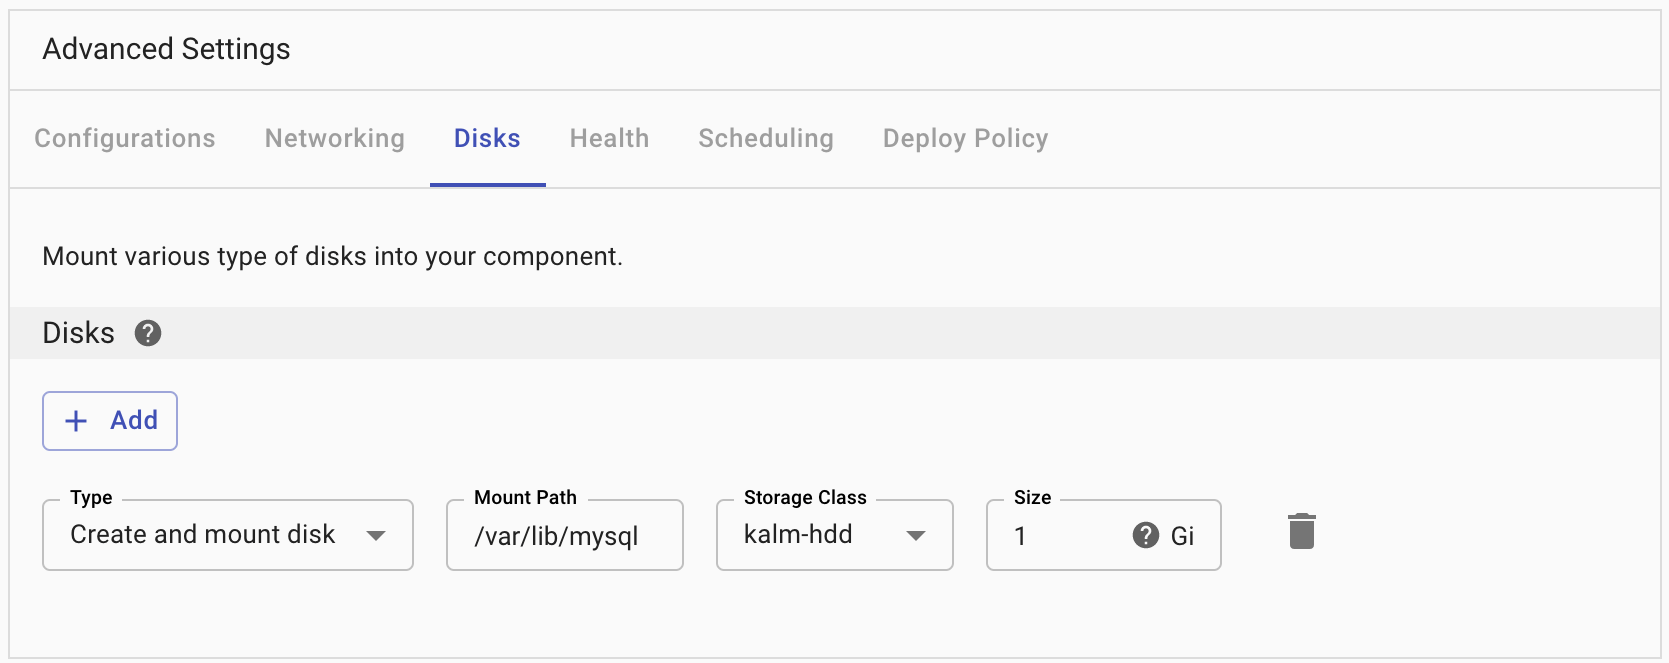
Disks
Lastly, we'll add some storage for this image. Click on the Disks tab.
- Under Disks, click + Add
- For the Type, keep the default
Create and mount disk - For the Mount Path, enter
/var/lib/mysql - For the Storage Class, keep the default
kalm-hdd - For the Size, enter
1Gi
- For the Type, keep the default
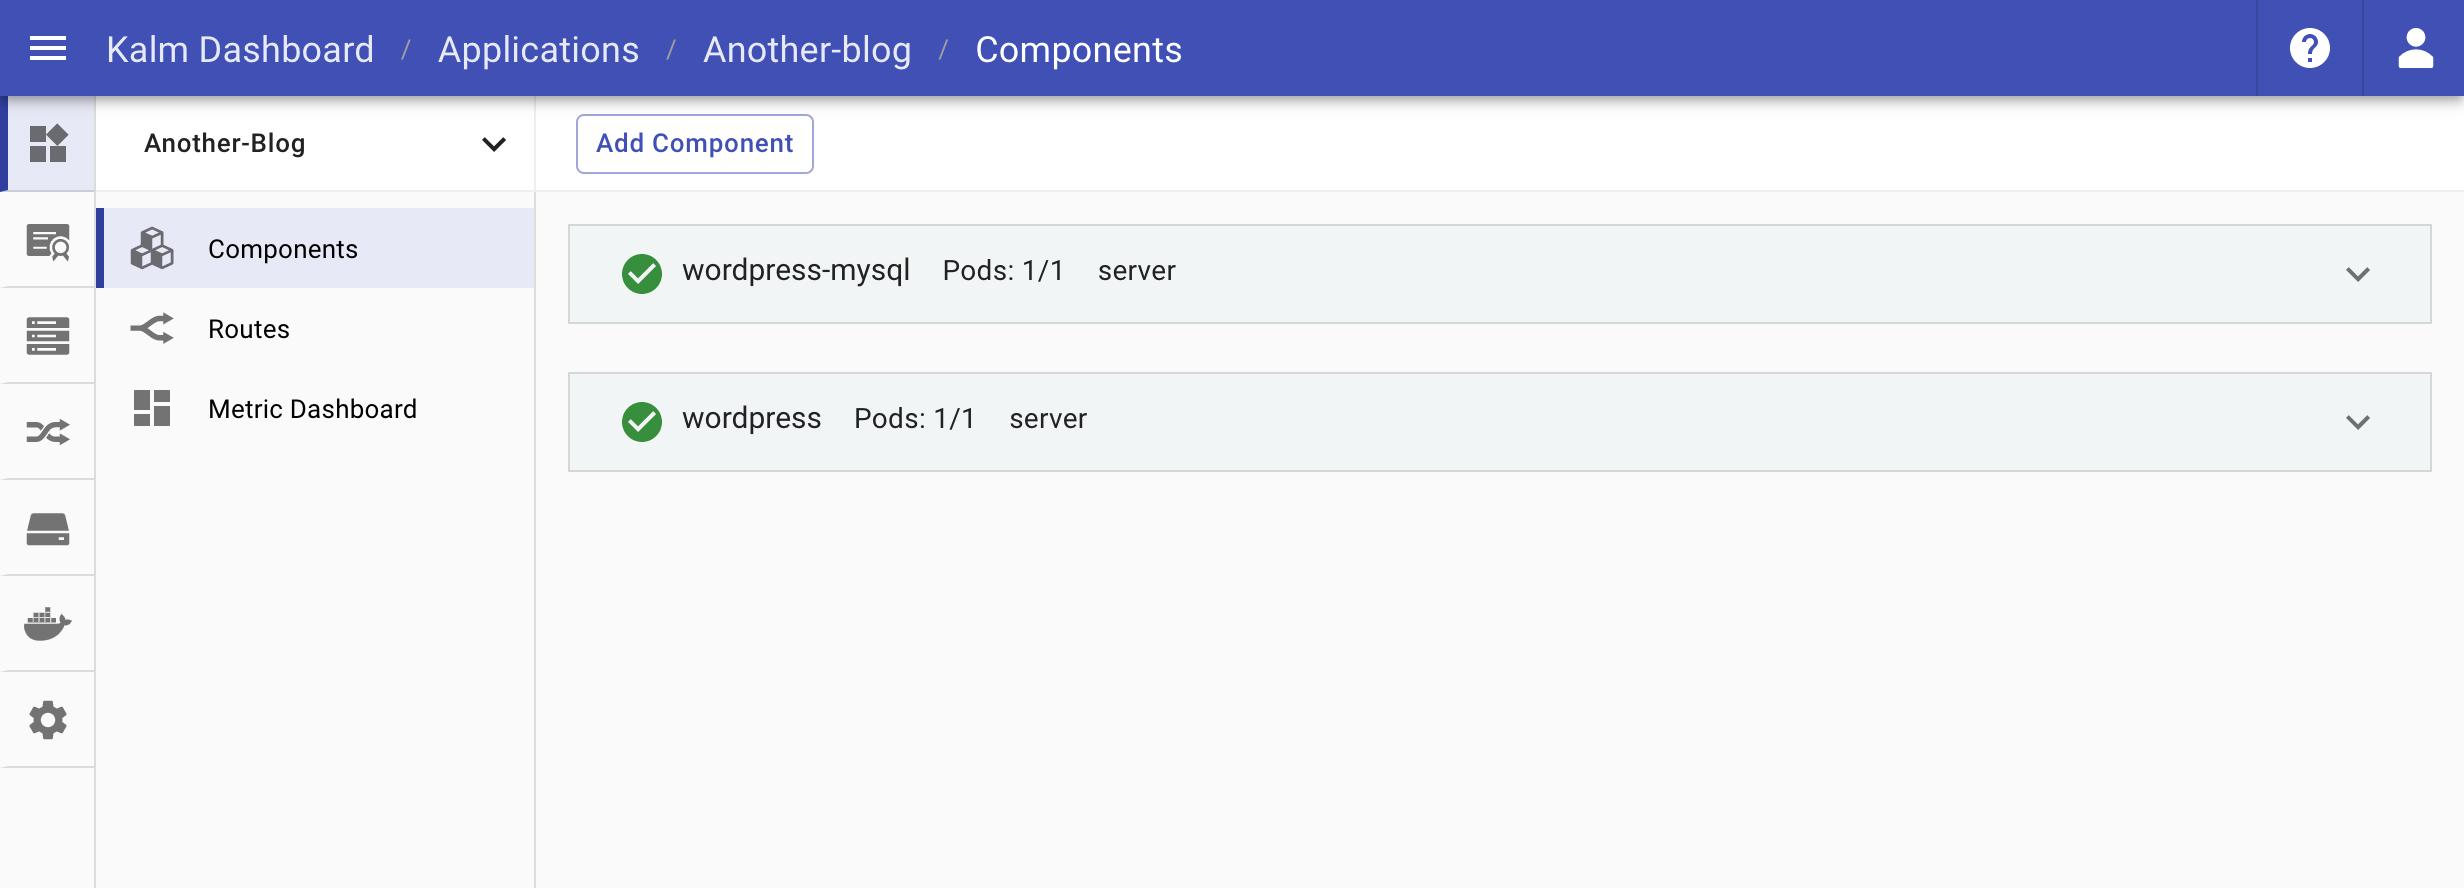
Click Deploy Component and our pod will start spinning up. While this is deploying, we'll setup our second component.
Add The Wordpress Component
To add our second component, we'll click Add Component from the Application Components page.
- For the component Name, enter
wordpress - For the component Image, also enter
wordpress
Configurations
Once again we'll move to the Config tab. This time we're adding two Environment Variables.
- Under Environment Variables, click + New Variable
- For the Name, enter
MYSQL_ROOT_HOST - For the Value, enter
wordpress-mysql
- For the Name, enter
- Click + New Variable again to add a second Environment Variable
- For the Name, enter
MYSQL_ROOT_PASSWORD - For the Value, enter
mysql-pass
- For the Name, enter
Networking
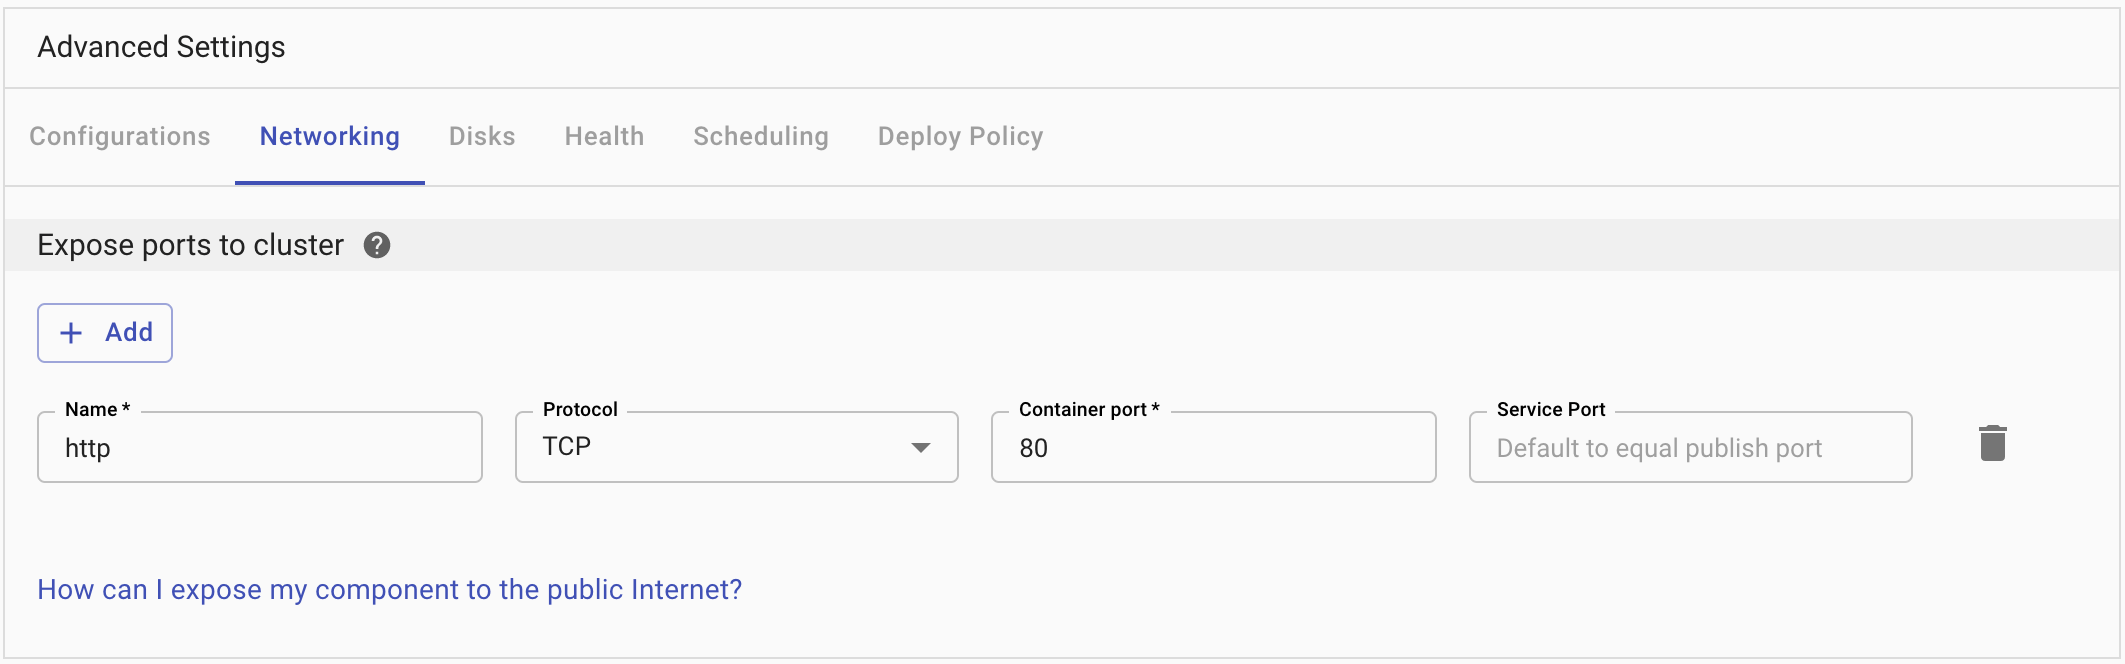
Once again we'll click the Networking tab and expose a container port to the cluster.
- Under Ports click + ADD
- For the Protocol, keep the default
http - For the Container Port, enter
80 - You can keep the Service Port blank again
- For the Protocol, keep the default
Disks
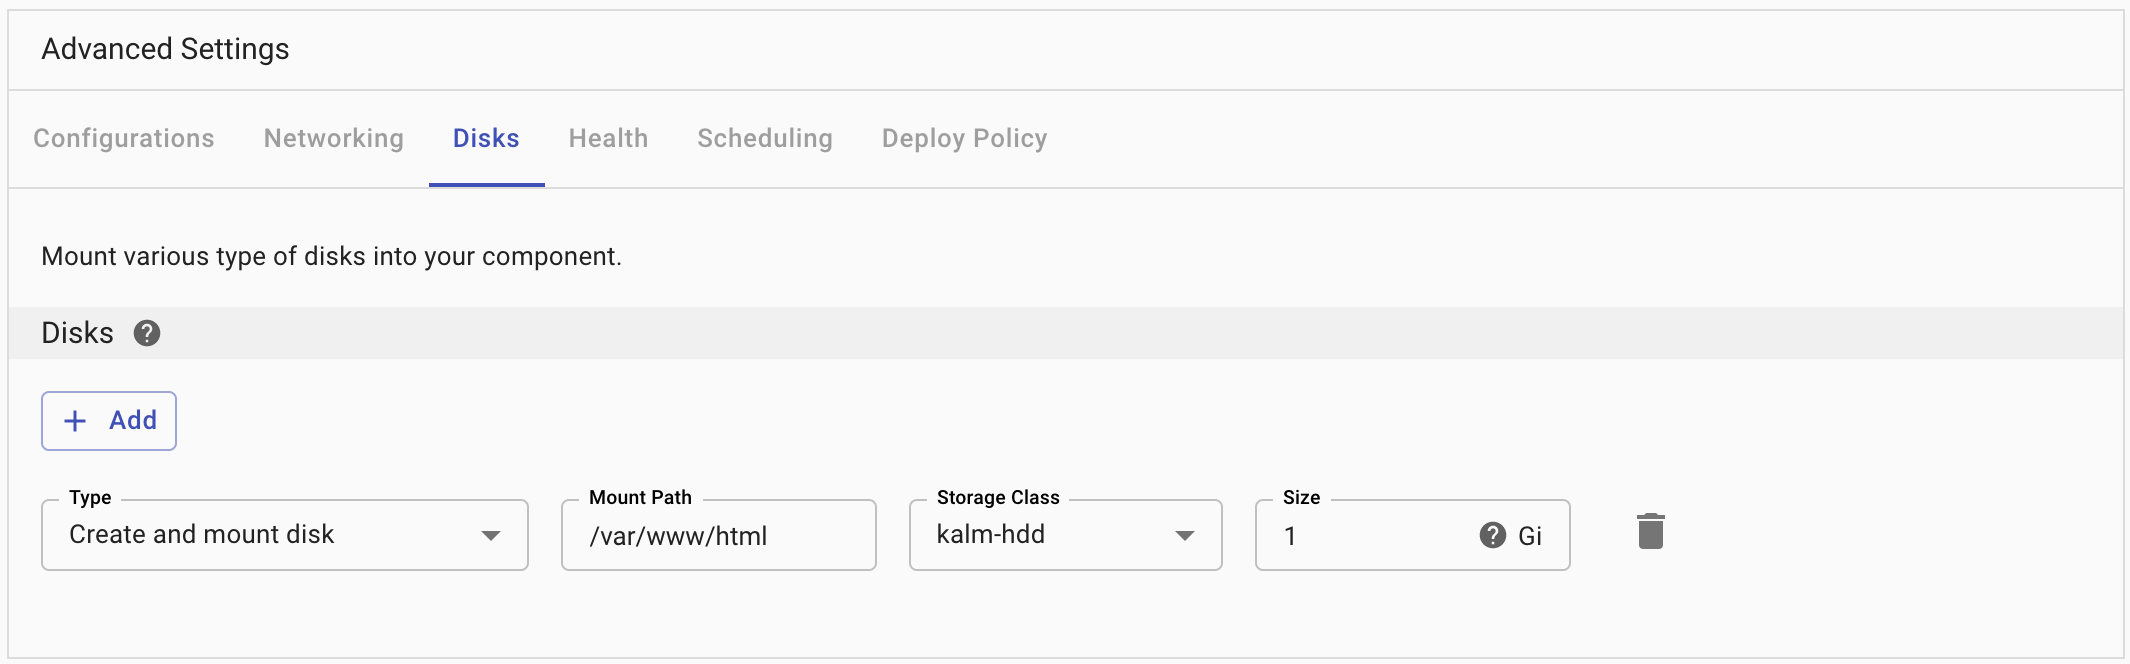
Again we'll click the Disks tab to add storage for this component.
- Under Disks, click + Add
- For the Type, keep the default
Create and mount disk - For the Mount Path, enter
/var/www/html - For the Storage Class, keep the default
kalm-hdd - For the Size, enter
1Gi
- For the Type, keep the default
Add Route
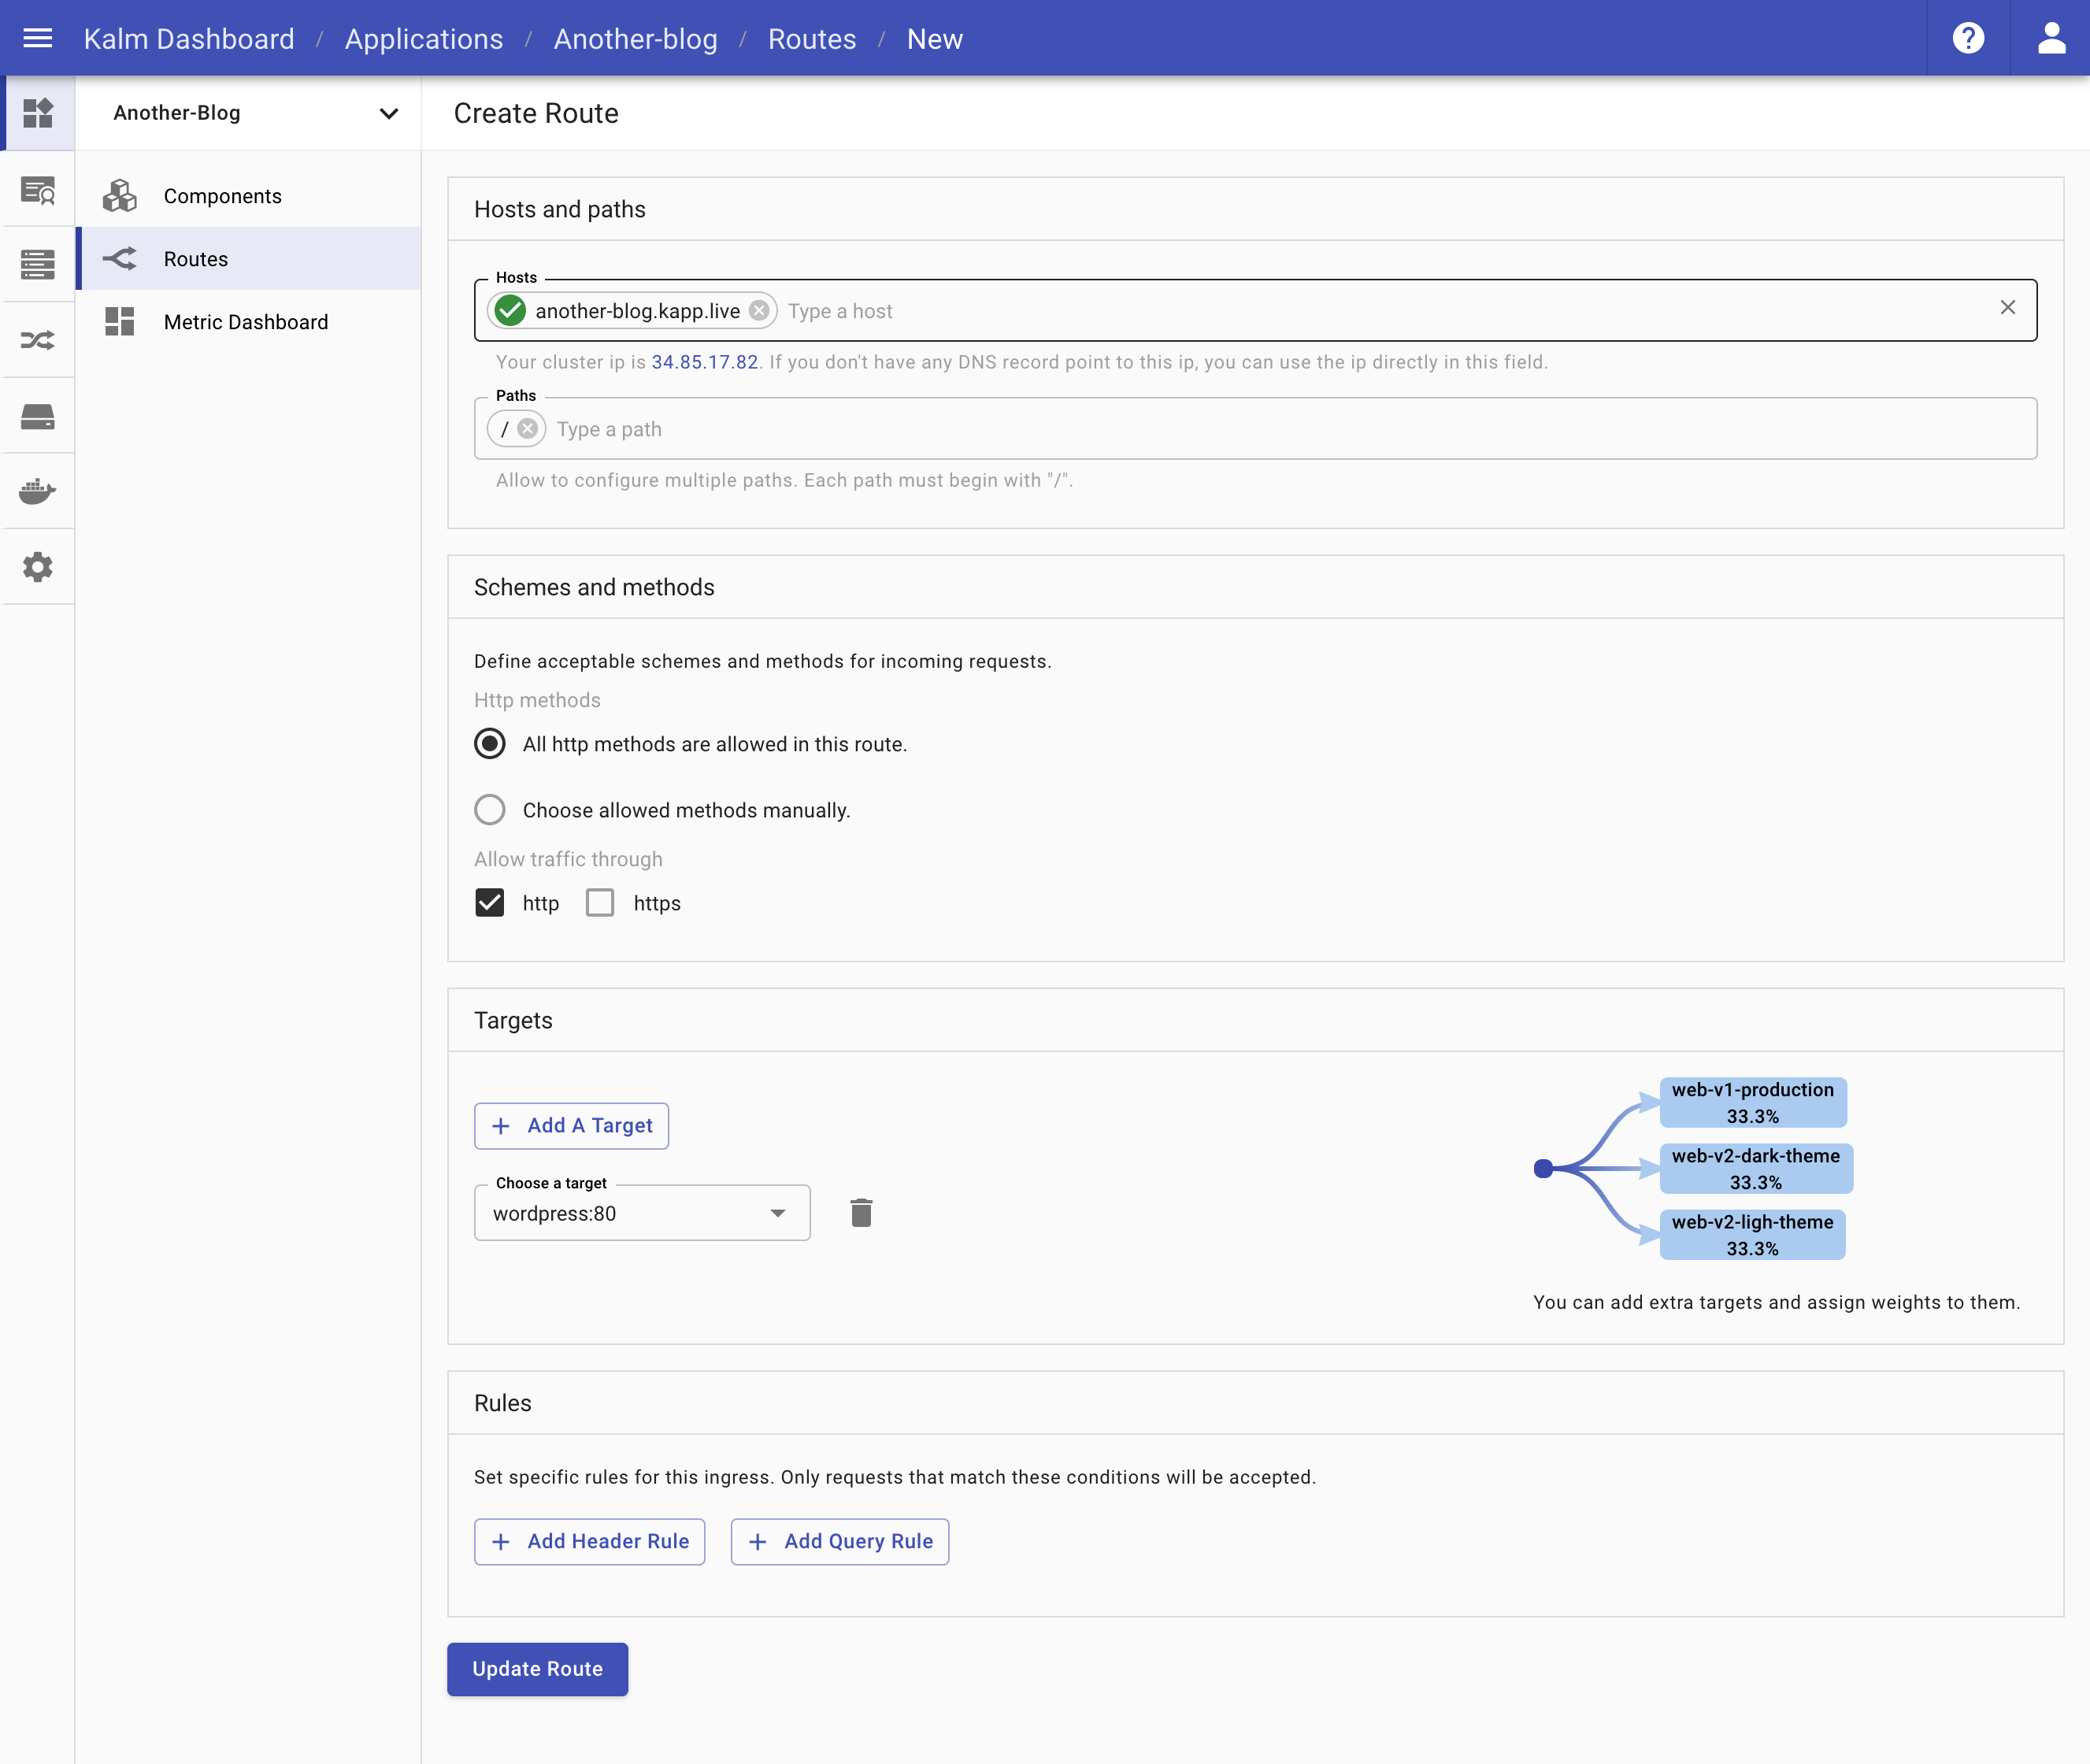
Lastly, we need to open a Route for our WordPress component so we can access it via a web browser. Click the Routes tab on the left navigation menu.
- Click
Add Route- For Hosts, you can either use your own domain or just click the ingress ip quick action (the cluster IP under the Hosts input field)
- For Targets, click the Choose a target dropdown and select your
wordpress:80component from the menu. - You can leave all of the other options as their defaults
- Click
Create Routeto create your route
Rock it!
After a few seconds, all of the components should be up and running and there should be a green checkmark next to your new route.
You can click the domain to open up and play with your new WordPress site!